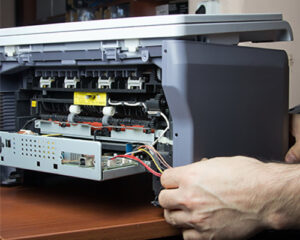
Fax is one of the oldest analog technologies, and with telephone companies nowadays using electronic digital lines for communication, it is quite possible that the HP machine may come across some communication problems. The disturbance that comes due to the static sound over the digital line is likely to create interaction errors. If one is not sure how to fix these technical issues, it is ideal to connect to the HP Printer service and repair. But before that happens, continue reading this article and explore all causes of 344 error and a few ways to fix the issue.
Causes of Error HP Fax Error 344
Here is a compilation of some probable causes that could lead to HP fax error 344:
Sometimes the distant individual may pull the Quit switch even before the far-off gadget has completely received the fax.
Once the connection gets disturbed, the HP machine quits reacting to the fax order from another gadget. These issues may happen when the telephone lines of the surroundings are old. There could also be a static on the telephone line.
Other force-related or natural issues also have the ability to ruin the network of fax machines.
Sometimes because of some unprecedented circumstances, a contention separates the two machines and could trigger one of the machines to interfere or end the call.
Even though the reasons mentioned above are mostly not in your hands, you can try the given troubleshooting options before calling your nearest HP printer repair in Mumbai.
Fix the HP Fax Error 344-Troubleshooting options
Option 1: Modify error correction mode
- Select the Setup button present at the front board of the printer.
- Use the Fax Setup option.
- Next is the Advanced Fax Setup choice.
- Snap-on or select Error Correction Mode
- Switch off the message showing Error Correction Mode, and it should resolve the issue.
Through this step, one can eliminate the mistake from the printer’s end. If the problem is not settled at this point and still persists, try these other options.
Option 2: Modify fax speed
- Tap on the Set-up button on the front panel of the printer.
- Select Fax Setup from the list.
- Proceed to the Advanced Fax Setup settings.
- Time to edit the Fax Speed.
- It should be set to slow, up to 9600 bps.
Option 3: Rebuild the connection
- Trying to reconnect the connection of the fax receiving head upon correction of the telephone line may help.
Option 4: Change the LAN settings
- Go to the Control Panel >>Open Network >> Internet >> web choices.
- Select the LAN settings from Connections.
- Ensure that the correct settings and arrangement scripts are entered. Select OK and reload the page.
Option 5: Update the printer driver
- Push Start or Windows symbol.
- In the search box, type and select the Device Manager. Here find and select other gadgets.
- Next, right-click on the option where you need it to introduce the driver.
- Select the Update Driver Software and browse the recently opened windows.
- Introduce the necessary drivers or driver update and proceed to Next.
- Close and reboot the system to finish the establishment interaction.
Win99z? It passed the vibe check. The interface is clean, and loading times are decent. It’s not gonna blow your mind, but it’s a serviceable way to kill some time. win99z
Interesting take on bankroll management! Seeing platforms like jiliboss casino emphasize data really shifts the game. KYC is a must for secure play, though-good to see that prioritized! 🤔
https://shorturl.fm/xNiNz
https://shorturl.fm/yMNCE
https://shorturl.fm/snqri
https://shorturl.fm/TpBRI
Looking for some Soicauxsmb Kubet tips? This site might be helpful! I found soicauxsmbkubet to be useful for predictions, but always do your own research too! Nothing is a guarantee! Good luck, and have fun: soicauxsmbkubet
Checking out 777xpgamepk.com now. This site better have some goodies to offer, or it’s a hard pass. 777xpgamepk
https://shorturl.fm/cOEsf
https://shorturl.fm/wsEs5
https://shorturl.fm/LeYAT
I visited multiple blogs but the audio feature for audio songs present at this site is truly wonderful.
Right, let’s talk fuwinplataforma. Kinda new to this but this platform has a clean design! I’m still learning about it. Worth exploring though! Here’s fuwinplataforma to check out.